Intro to Markup and Web Design
Work to have done: Write a website proposal and post it to the issue queue
Plan for the day:
- Introduction to markup and style
- Brief tour of key Atom features
- Start the tutorial (with chapter 2)
- EXT: Tour of unit resources
- HW for next time
1. Introduction to markup and style
Begin in the garden
Before we dive in deep, come with me to the CSS Zen Garden.
Some things to notice:
- Responsive design: the same page can change appearance to suit the “viewscreen” (especially as the width changes).
- The visual hierarchy holds here, too – including uses of containment and alignment to form groups, and negative space to establish rhythm.
- So, too, are we retaining the importance of color schemes for both coherence and contrast.
- Oh, and also? Every page you’ve just seen has exactly the same underlying content.
HTML vs CSS: separating content from display
How? The key is encoding the content separately from the presentation. And that’s where our “web stack” begins: with HTML and CSS.
| acronym | stands for | used for |
|---|---|---|
| HTML | HyperText Markup Language | content, groupings |
| CSS | Cascading Style Sheets | display / presentation |
In other words, per the tutorial I’m assigning you for homework,
- HTML is for adding meaning to raw content by marking it up.
- CSS is for formatting that marked up content.
There are other languages that interact with these two, especially JavaScript, but also PHP and Python and Ruby: they can dynamically generate or change the HTML and CSS. There are also “preprocessor” languages that make it easier to write HTML and CSS in the first place by eliminating some repetition. You’ve already seen one of these: Markdown, the syntax you use in GitHub READMEs and forum posts, is essentially a shortcut form of HTML.
But even with all that complexity, it boils down to this: HTML and CSS are the core of what gets shown on the screen.
HTML gives the document structure
Even if you’ve never used a formal markup language, you already use symbols to highlight one part of a text document and show that it’s different from the rest. Let’s take Markdown as an example:
- If you want to make something bold, you…
- put
**asterisks**on either side of it.
- put
- If you want italics, you…
- put
_underscore_on either side (single asterisks will work, too).
- put
The same is true in HTML, but it looks a little different:
| what we’re marking | Markdown syntax | HTML syntax | What you get* |
|---|---|---|---|
| strong text | **surrounding asterisks** |
<strong>opening and closing tags</strong> |
strong text |
| emphasized text | _surrounding underscore_ |
<em>opening and closing tags</em> |
emphasized text |
Unlike in Markdown, opening and closing tags in HTML aren't exactly the same. But they're almost the same: a closing tag in HTML just adds the slash after the first angle bracket.
You can think of them as being like parentheses: In general, every HTML tag you open, you should close. (You can nest a complete pair of tags inside another pair (like these parentheses), but you can't close the outer pair before closing the inner pair – at least, not without causing problems.)
One nice thing about having the tags themselves marked by angle brackets is that you can add information to them:
| what we’re marking | Markdown syntax | HTML syntax | what you get |
|---|---|---|---|
| a basic hyperlink | [anchor text](http://destination) |
<a href="http://destination">anchor text</a> |
anchor text |
| a hyperlink with extra info | no default way to do it! | <a href="http://destination" title="Explanation of where link goes">anchor text</a> |
anchor text |
HTML in practice
Armed with that information, you now know enough to go back to the CSS Zen Garden and see how it’s structured.
Right-click anywhere on the page, and choose View Source from the context menu that pops up.
Let’s have a look!
NB: Chrome and Firefox have the best tools for web development, as we'll see. If you're using Safari, you won't see View Source by default. But you can activate it under Safari > Preferences > Advanced, down on the bottom: "Show Develop menu in menu bar."
Show me
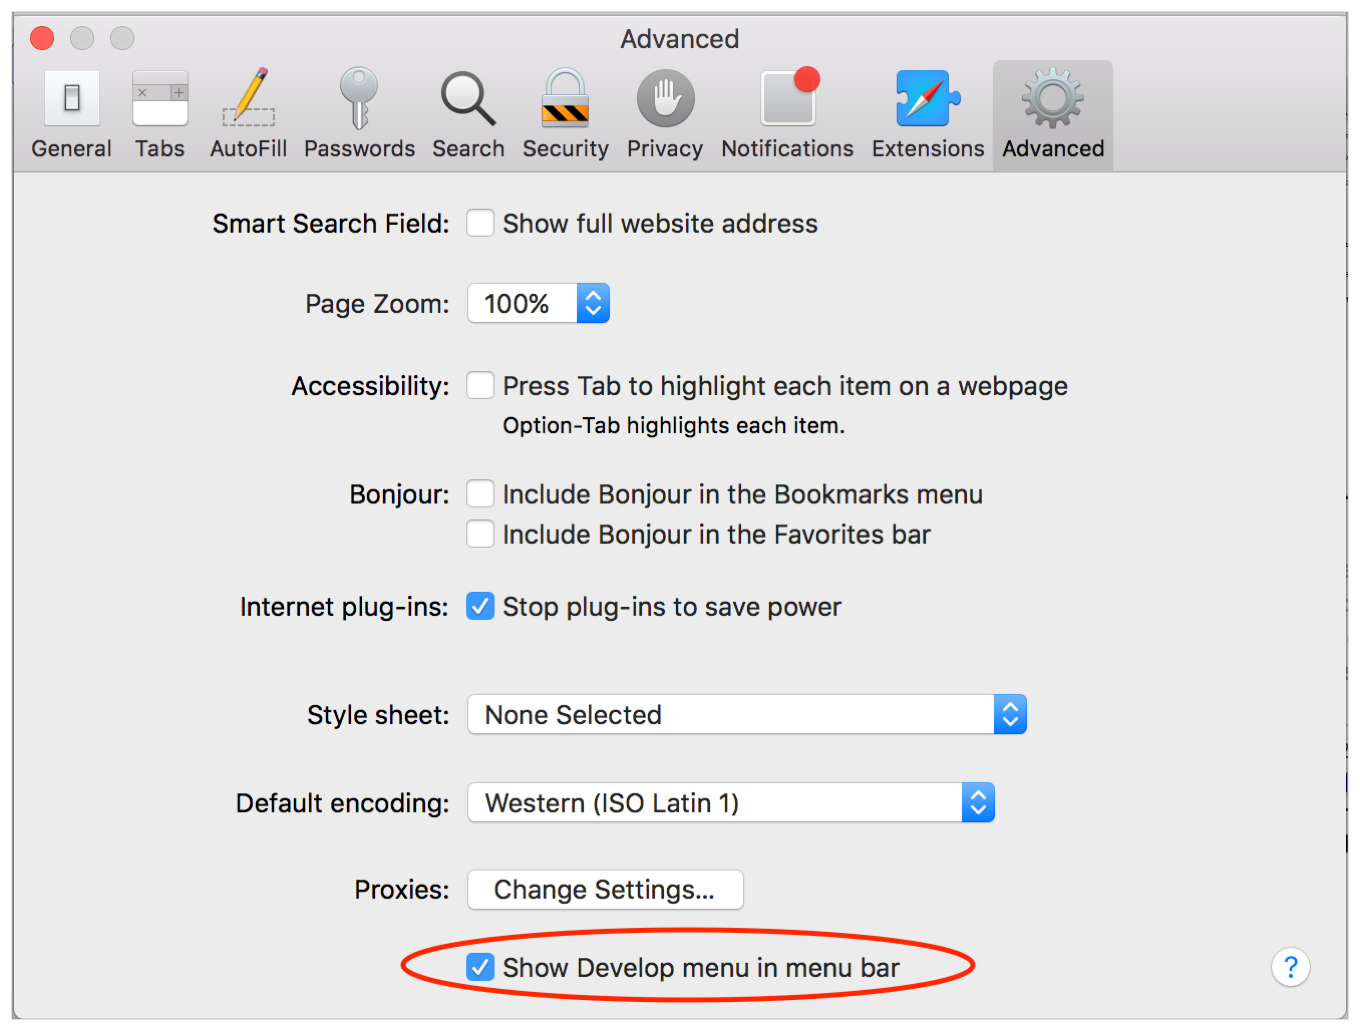
While you're there, you may want to tell the Smart Search Field to show the full site address, too.
A few things to note
divs are like layer groups: they wrap around content that function as a unit.sections andheaders andfooters are basically specialdivs!- h1, h2, h3, p establish hierarchy
- classes and ids are labels we can use to identify reusable content-types (classes) or unique locations (ids) within the document.
CSS in practice
CSS functions by selecting labeled content – HTML elements or classes, and sometimes other contextual cues – and assigning rules for how to display what’s been selected.
These rules generally live in a style sheet that’s linked inside the head element of the HTML document.
Let’s look at some of those CSS Zen Garden style sheets: head back to the top, and click the link in line 7.
You can play
You can View Source on literally any website – though some are more complicated than others.
You can also Inspect a live website, using the same context menu (again, Safari users have this disabled by default), and see all the CSS rules currently being applied to any HTML element you want.
What’s more, you can change or add CSS rules on the fly. (It’ll stay as long as you don’t refresh the page… though you can also copy the new rules before you leave.)
You’ll want to come back to this when you’re working on your own designs!
Atom orientation, then start the homework tutorial
For now, though, I suspect for many of you it’ll be most useful to get your feet back on the ground.
I’ll be asking you to work through the tutorials at Interneting is Hard (but it doesn’t have to be), starting over break with at least the first four chapters: that will take you from “what is HTML?” through “Hello, CSS!”
Before you leave today, I want to make sure you're able to get up and running with your text editor and a browser, and seeing how they interact.
The first chapter of the tutorial (“Introduction”) mostly covers what we just talked about, and – unlike every other chapter – doesn’t include any hands-on code examples that you’re supposed to copy. So for today’s class, I’d like you to start with chapter two: “Basic Web Pages“.
Key Atom features that will make your life easier
- Split Left / Split Right (right-click any filename)
- View your HTML and CSS files at the same time! Or any two files. Or three, or six if you want to split top/bottom, too. It’s the best.
- Close current tag (under Packages > Bracket Matcher)
- Super-useful, both for speed (if you remember the keyboard shortcut) and as a form of proofreading: if Atom doesn’t know what you’re trying to close, something needs fixing.
- Comment out current line (Edit > Toggle Comment)
- Markdown preview
- Because Markdown includes HTML, you can also use this to preview pure HTML files! But it’s no substitute for a real browser, in the end.
- If there’s something you expect Atom to do, but it doesn’t, chances are someone’s already coded a Package to make Atom do it.
- To search for, install, or otherwise manage packages, go to Packages > Settings View and choose the option you need.
- Read the README inside an installed package for tips on how to use it.
Okay, go ahead and do chapter 2!
NB: I’ve already created folders for parts 1-3 in the GH repo you just forked; clone it to your local computer, and you should be able to work in those folders and push.
- Therefore, you can skip the step of creating a new folder in chapters 2 and 3: you already have one.
- You will, however, need to add your own folders for part 4 and thereafter.
I’ll float around and help.
EXT: Tour of unit resources
If possible, I do want to give you a quick overview of the assets and advice I’ve compiled so far on the course site’s resources page.
Homework for Next Time
- Do as much of the Interneting is Hard (but it doesn’t have to be) tutorial as time and interest allow – but at least parts 1-4 (from “Introduction” through “Hello, CSS”)
- Heads up to fast workers: “float” layouts used to be a big deal, but aren’t as widely recommended any more: modern techniques like grid and flex are more flexible, and easier to get right. You can probably skip that chapter, at least for now; the Resources page has links to some Grid tutorials.
- Show your work by pushing your tutorial code to GitHub.